
前言
最近在研究一件事——就是把下载好的字体文件放入 /source/fonts/ 文件夹中,如何通过撰写 CSS 样式文件来引入?
相信不少人都像我一样,想让自己的博客页面更有自己的个性,于是选择了生态丰富的 Hexo 框架和相对好看的 Butterfly 主题。但是,在构建过程中,难免会遇到一些麻烦。
准备工作
以我下载好的多字重 MiSans 字体和 Google Fonts 的 Noto Sans[1]/Serif[2] SC/TC/HK/JP/KR、Roboto、Roboto Slab、Roboto Mono 在线字体为例。
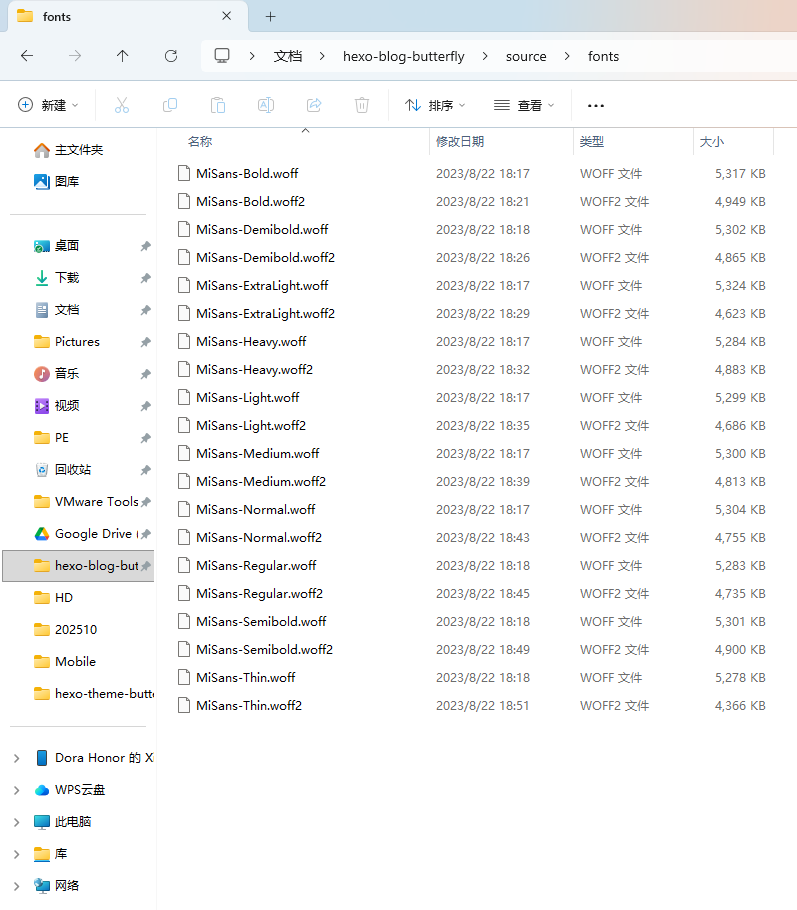
下载 MiSans 字体
先在 /source/ 里创建 fonts 文件夹,把所需 *.woff、*.woff2 格式字体复制进去。
导入 Google Fonts
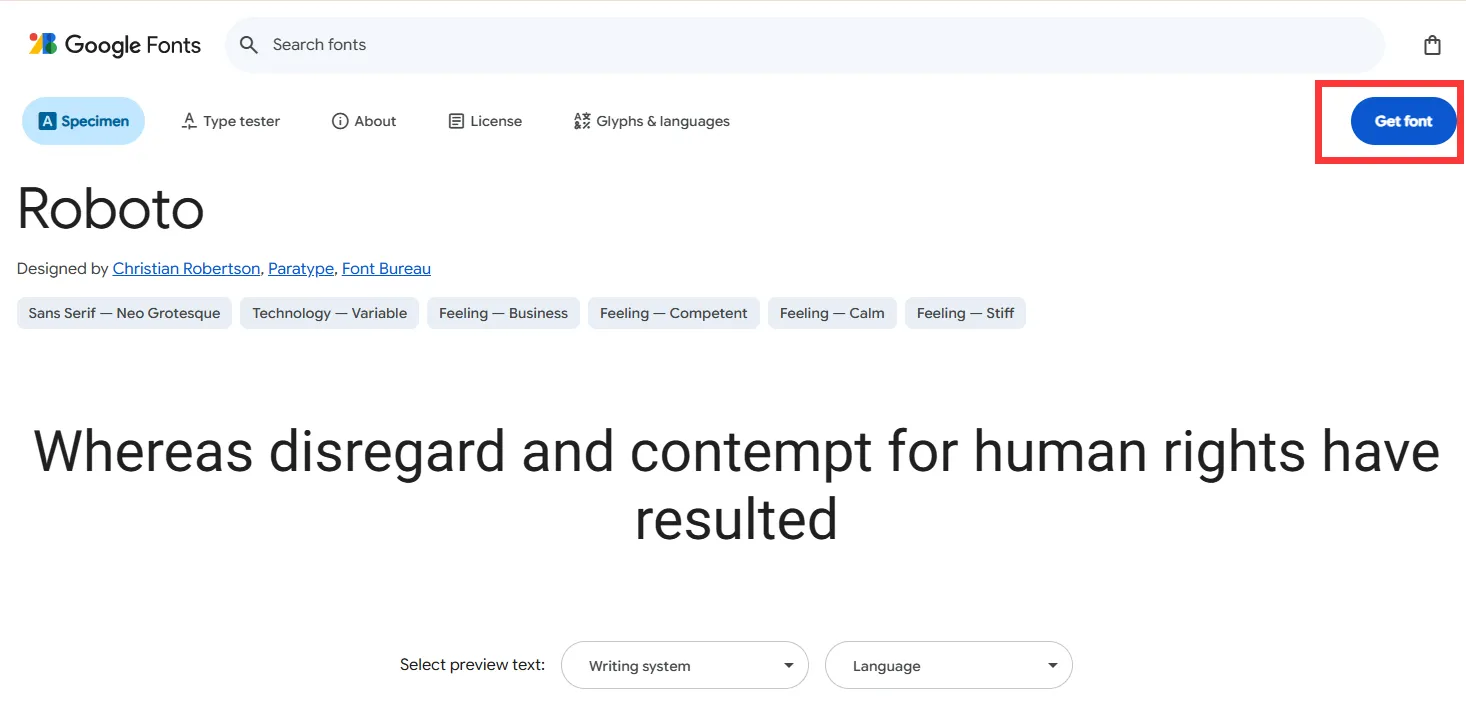
进入 Google Fonts 官网。

搜索上述字体,对所有字体都选择右上角的【Get font】加入购物车。
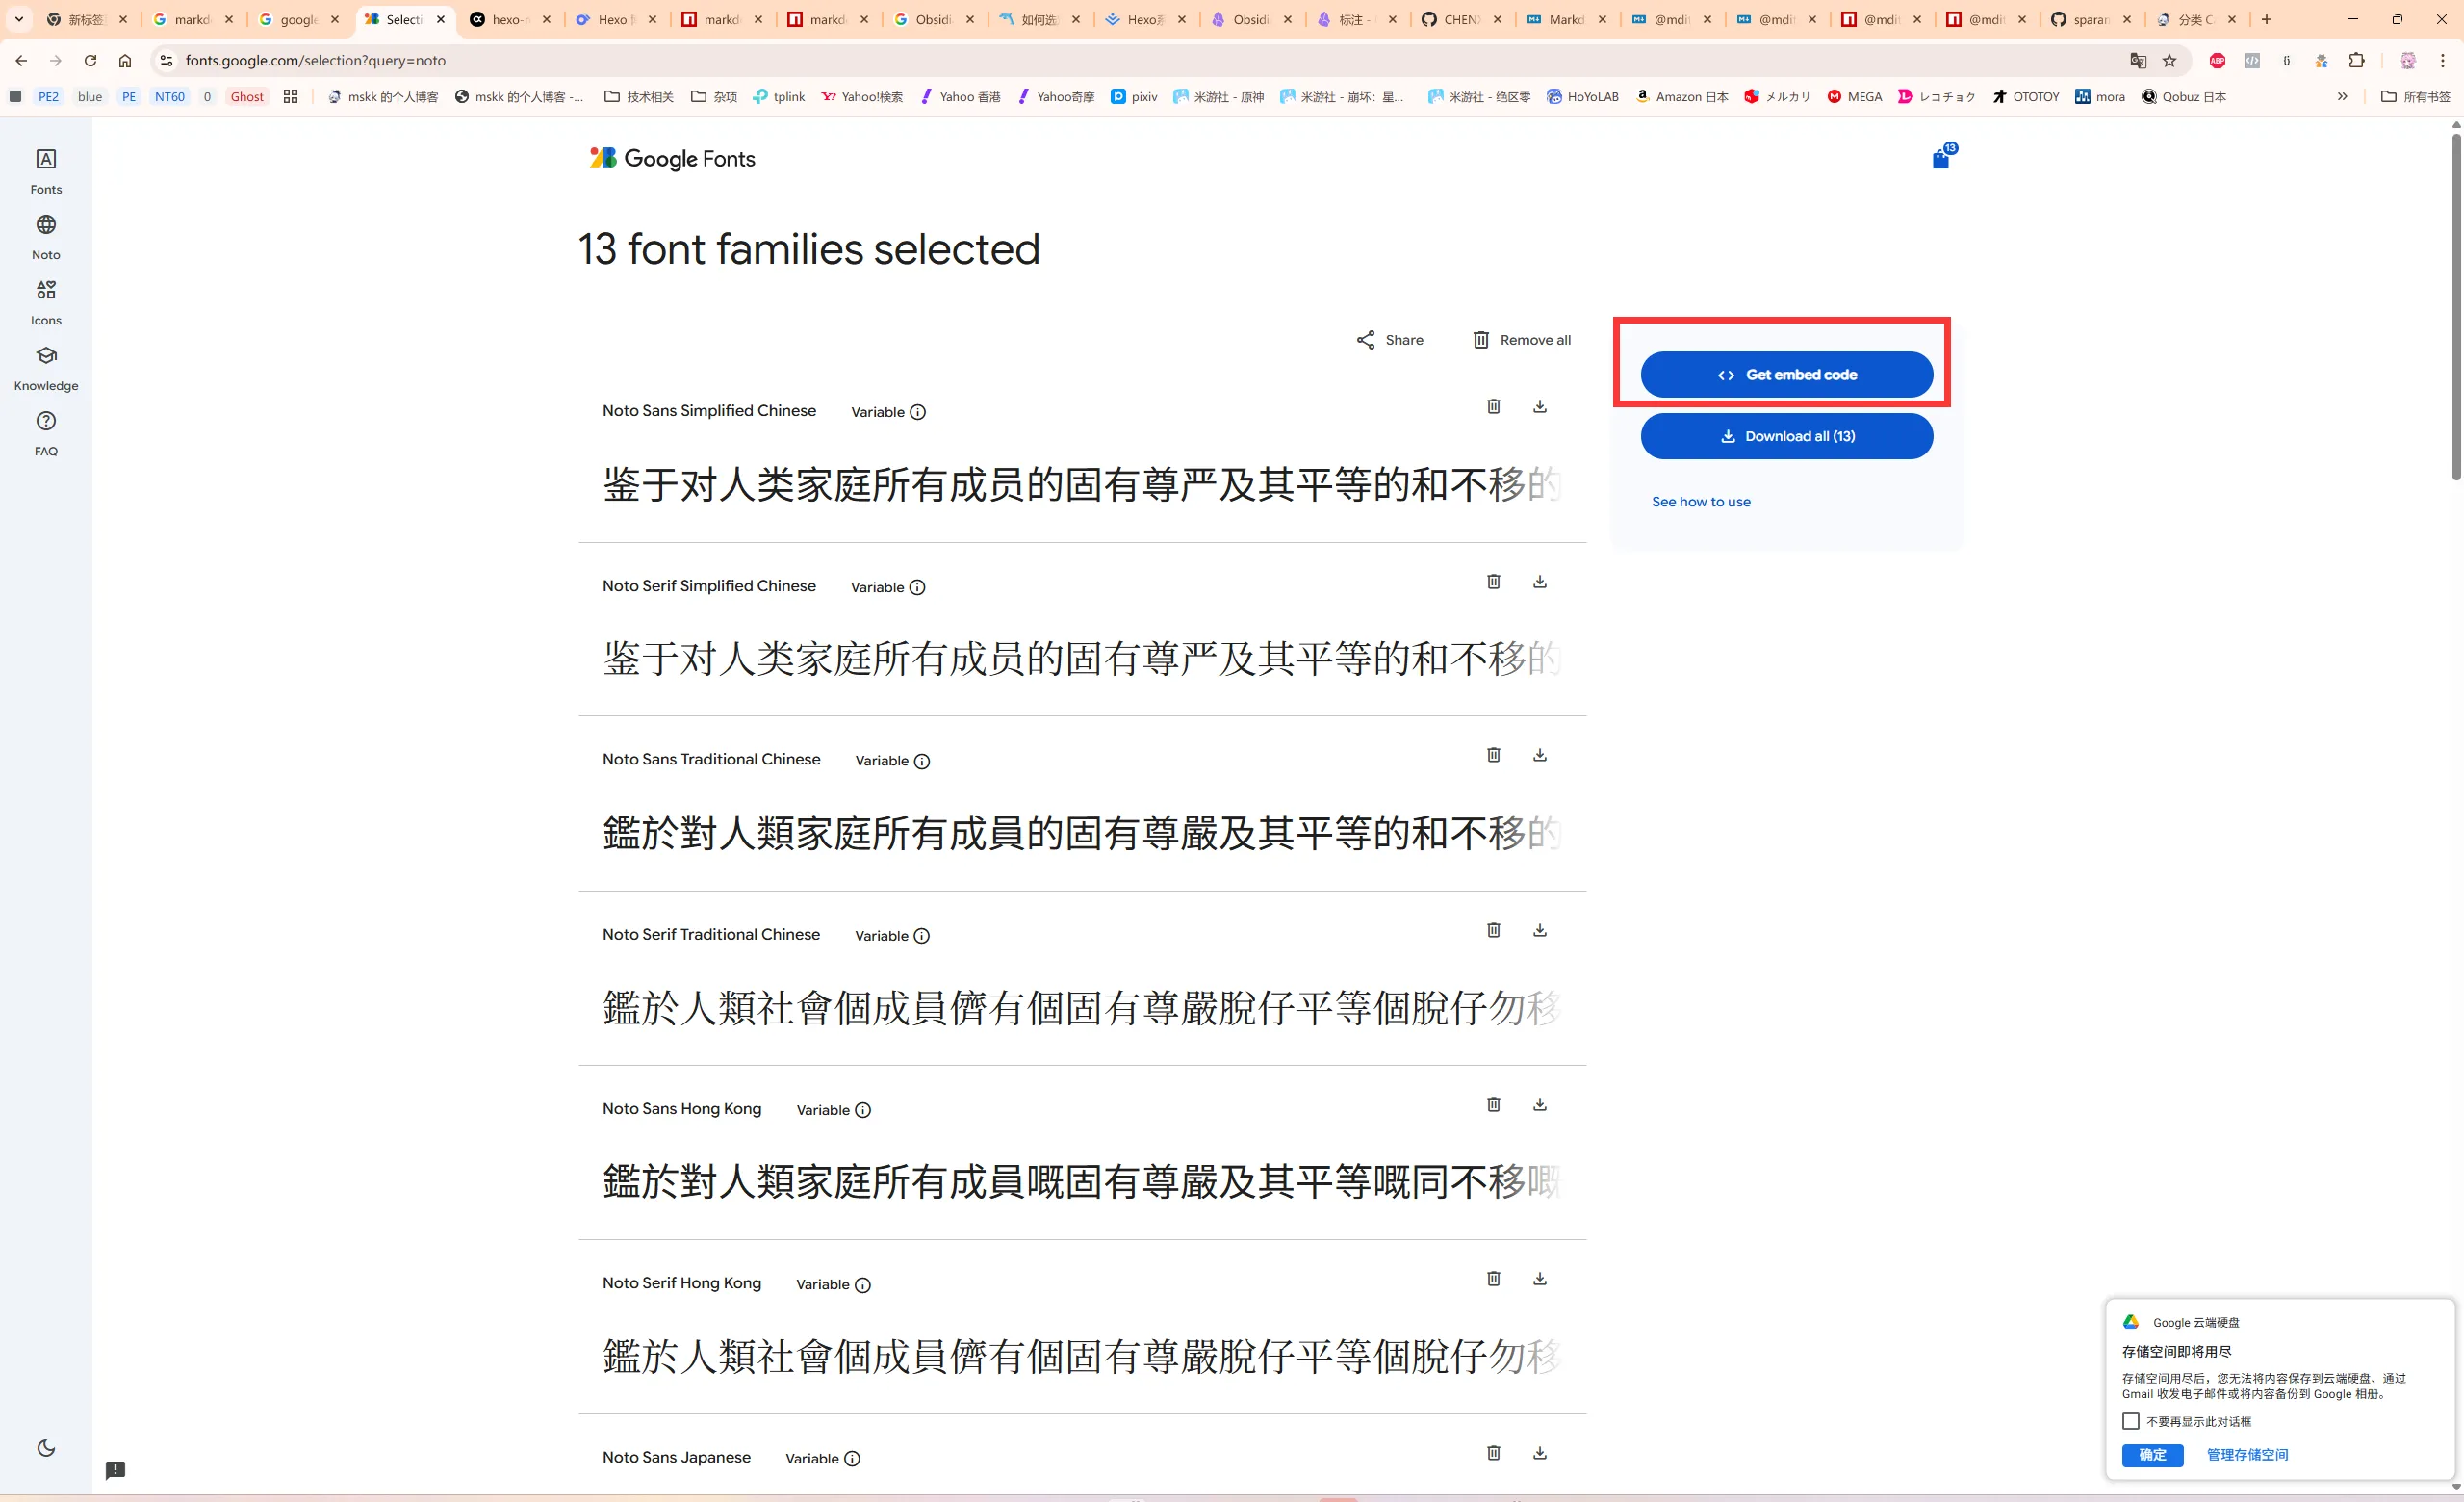
单击页面右上角的购物车按钮,选择右侧的【Get embed code】。
在 Web 栏中选择 @import 单选框,在第一个代码框中将 <style> 和 </style> 内的链接复制出来。
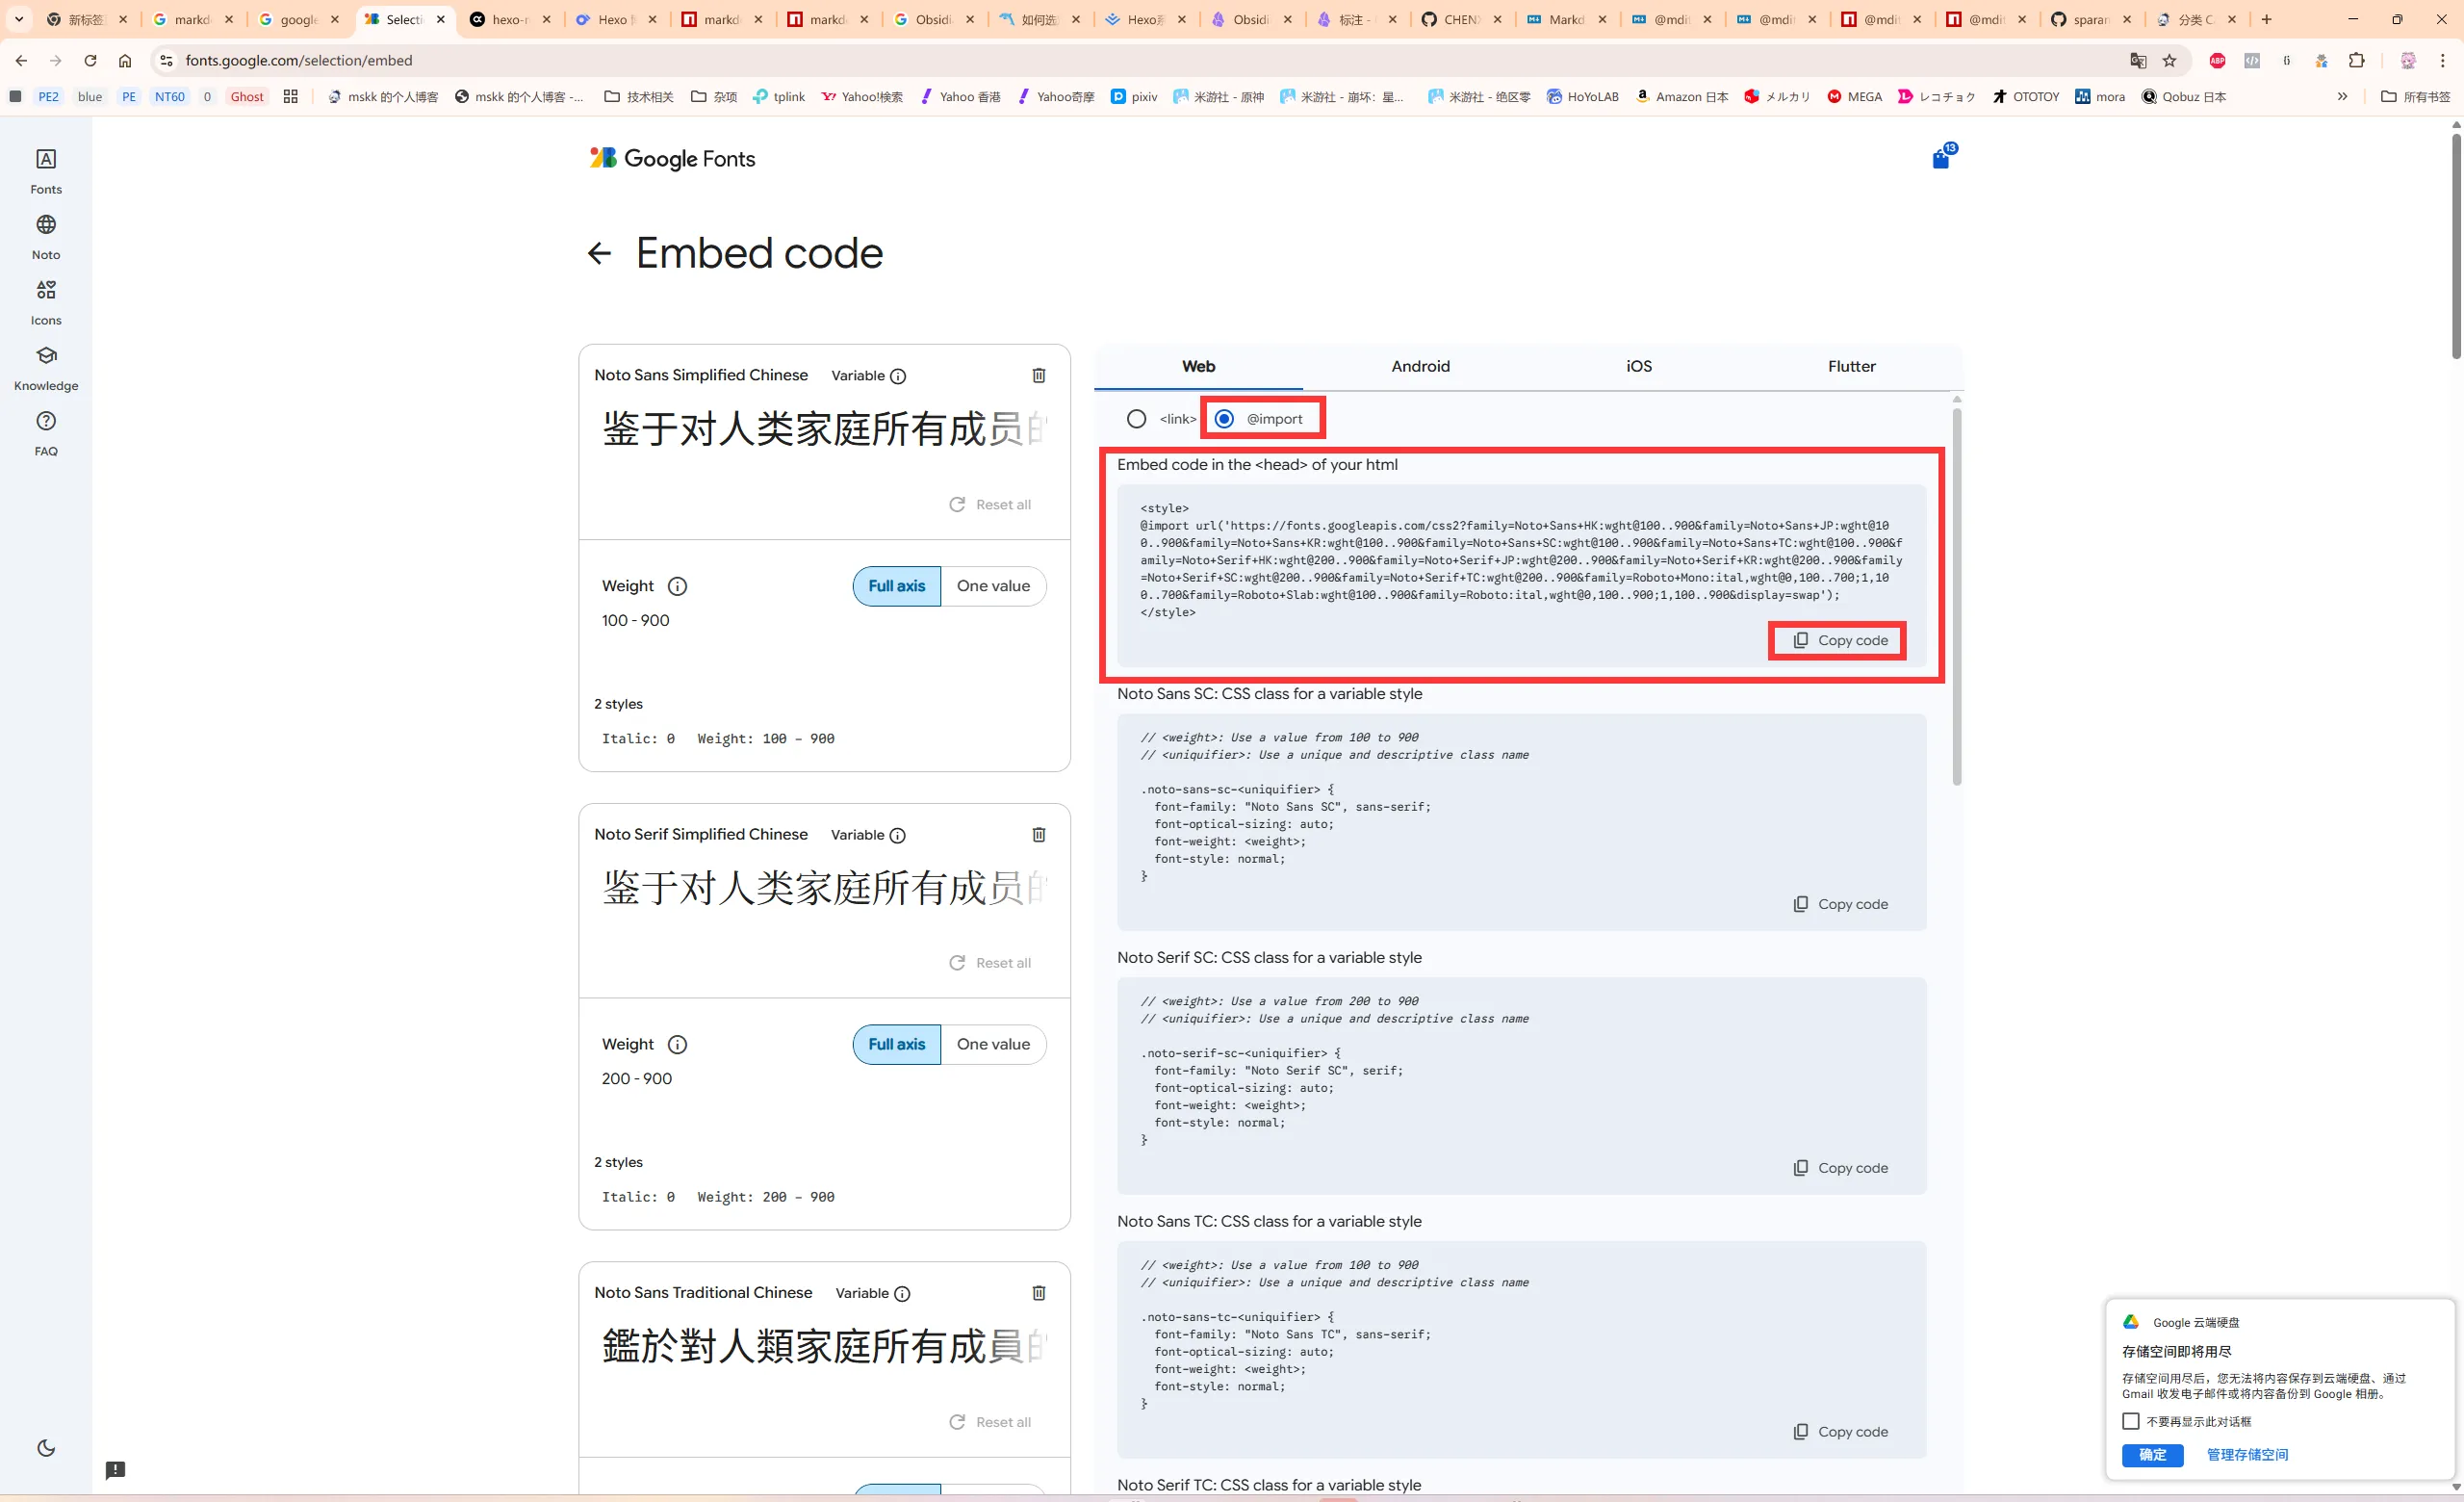
@import url("https://fonts.googleapis.com/css2?family=Noto+Sans+HK:wght@100..900&family=Noto+Sans+JP:wght@100..900&family=Noto+Sans+KR:wght@100..900&family=Noto+Sans+SC:wght@100..900&family=Noto+Sans+TC:wght@100..900&family=Noto+Serif+HK:wght@200..900&family=Noto+Serif+JP:wght@200..900&family=Noto+Serif+KR:wght@200..900&family=Noto+Serif+SC:wght@200..900&family=Noto+Serif+TC:wght@200..900&family=Roboto+Mono:ital,wght@0,100..700;1,100..700&family=Roboto+Slab:wght@100..900&family=Roboto:ital,wght@0,100..900;1,100..900&display=swap") |
正式开始
创建 CSS 样式文件
用 VS Code 创建一个 CSS 样式文件,保存在 /source/css/ 下。 下面以 fonts.css 文件名为例。
@import url("https://fonts.googleapis.com/css2?family=Noto+Sans+HK:wght@100..900&family=Noto+Sans+JP:wght@100..900&family=Noto+Sans+KR:wght@100..900&family=Noto+Sans+SC:wght@100..900&family=Noto+Sans+TC:wght@100..900&family=Noto+Serif+HK:wght@200..900&family=Noto+Serif+JP:wght@200..900&family=Noto+Serif+KR:wght@200..900&family=Noto+Serif+SC:wght@200..900&family=Noto+Serif+TC:wght@200..900&family=Roboto+Mono:ital,wght@0,100..700;1,100..700&family=Roboto+Slab:wght@100..900&family=Roboto:ital,wght@0,100..900;1,100..900&display=swap"); |
引入 CSS 样式文件
在项目根目录找到 _config.butterfly.yml 文件并打开,找到 inject 注释开头的那行,如下所示。
# Inject |
在 head 处输入 <link rel="stylesheet" href="/css/fonts.css>。
# Inject |
修改字体样式
在项目根目录找到 _config.butterfly.yml 文件并打开,找到 Global font settings 注释开头的那行,如下所示。
# Global font settings |
将参数设为如下值。
# Global font settings |
备用字体根据自行需求填写。
建议多填备用字体,以避免部分字符显示不出的问题。
保存配置文件。
测试样式是否生效
在项目根目录的终端中输入 hexo server 命令并执行,待出现 localhost:4000 时,进浏览器开启链接,查看样式是否生效。
如生效,则可关闭该标签页,在终端中按 Ctrl-C 终止执行。
在服务器部署
此步略。
注意事项
- 不要在字体样式的 CSS 文件中加入
body项,否则_config.butterfly.yml配置文件的字体样式会失效,且会牵连主题原本自带的 font-awesome v6 图标导致不显示!
题外话
如何一次性引用多个自定义 CSS 样式?
我个人建议将多个 CSS 样式配置只写进一个文件里,这样不容易出现奇怪的问题。
例如将透明样式引入 CSS,只需在行末加入以下内容。
.layout_post>#post { |
注意要和原本的样式间隔一行。
参考资料
- 如何修改Hexo主题:Butterfly网站字体. Allen. https://www.luxiyue.com/server/如何修改hexo主题:butterfly网站字体/
- Hexo中Buttefly主题美化进阶(八) | 偷掉月亮. 偷掉月亮的阿硕. https://moonshuo.cn/posts/1481.html. 2022-11-25
- Butterfly 文檔(三) 主題配置 | Butterfly. Jerry. https://butterfly.js.org/posts/4aa8abbe/?highlight=css#全局字體. 2020-05-28
- Butterfly 文檔(六) 進階教程 | Butterfly. Jerry. https://butterfly.js.org/posts/4073eda/. 2020-05-28
 微信 WeChat
 支付宝 Alipay